To make dark stained wood lighter, sand the surface and apply a lighter stain. Use a wood bleach for more drastic lightening.
Transforming dark stained wood into a lighter shade is a project that can refresh the look of furniture or flooring without the need to replace it.
It involves a straightforward process of removing the old stain before applying a new, lighter tone.
Sanding is often the first step, stripping away the dark finish to reveal the natural wood beneath.
For those wanting an even lighter effect, wood bleach can be a powerful ally, breaking down the stain pigments further.
This task requires proper preparation, the right materials, and safety precautions, such as wearing gloves and working in a well-ventilated area.
Achieving the desired wood tone can be a satisfying DIY venture that enhances your interior’s aesthetic.
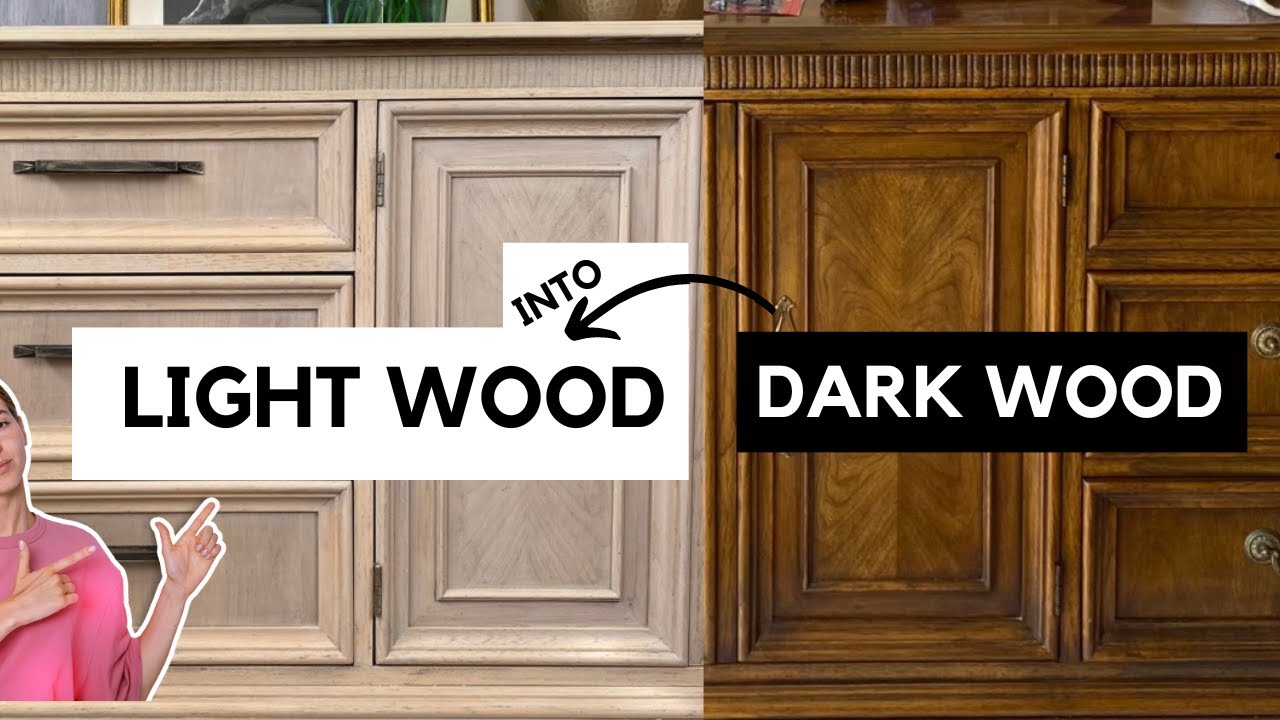
Credit: m.youtube.com
Introduction To Wood Staining
Changing the color of wood can transform its look entirely. People often stain wood to protect it and make it last. Dark stains can give wood a rich and warm finish.
Sometimes, you might want to change the style or correct a staining mistake. Making dark stained wood lighter involves a few steps but is doable with the right approach.
The Purpose Of Wood Stains
Why do we stain wood?
Mainly, stains enhance the natural beauty of the wood, offering protection from damage.
They also help in hiding imperfections, adding to the wood’s durability. Stains come in various shades, allowing for the customization of furniture and flooring to suit personal tastes.
Challenges With Dark Stains
While dark stains have their appeal, they present challenges. Adjusting the tone of dark stains requires extra care and attention to avoid damaging the wood.
The process involves stripping the original stain, which, if not done correctly, could lead to uneven results.
It’s crucial to understand the process and use the right materials for the best outcome.
Safety And Preparation
Transforming dark-stained wood to a lighter shade requires care. Proper preparation and safety measures ensure success without compromising your health or the wood’s integrity.
Follow these steps before diving into your project.
Essential Safety Gear
Working with chemicals and wood can be hazardous. Protect yourself with the right gear:
- Goggles to shield your eyes from splashes and dust.
- Respirator mask to avoid inhaling fumes and particles.
- Gloves, preferably nitrile, to protect your skin.
- Long-sleeved shirt and pants to cover exposed skin.
Preparing The Workspace
Select a well-ventilated area to work in. Open windows or use fans to circulate air. Cover surfaces with plastic sheets or newspapers to catch spills.
Keep a first aid kit and a fire extinguisher nearby. Organize your tools and materials for easy access.
Initial Assessment Of The Wood
Before altering wood, understand its condition:
- Check for sealants or varnishes on the surface.
- Examine the wood for damage or blemishes.
- Determine the type of wood and its stain depth.
A thorough assessment will guide the lightening process.
Stripping The Dark Stain
Transforming your wood from dark to light involves a crucial first step. You need to remove the old stain. Careful stripping clears the way for a beautiful new shade.
Let’s explore the best methods to strip that dark stain off your wood surfaces.
Choosing The Right Chemical Stripper
Finding an effective chemical stripper is key. Several types exist, so consider the wood type and your safety. Look for non-toxic and eco-friendly options if possible.
Options such as citric-based strippers are safer for indoor use and go easy on your wood.
Application Techniques For Stripper
To apply stripper correctly, put on safety gloves and goggles.
Use a paintbrush for an even layer. Generously coat the wood, but avoid overspreading. Cover every inch of the surface for consistent results. Always work in a well-ventilated area.
Removing The Stripper And Scrubbing The Wood
After the stripper sits, it’s time to remove it. A plastic scraper can gently lift the dissolved stain. Avoid metal tools; they might scratch the wood.
Once you’ve removed the stripper, use fine steel wool to scrub the surface. This helps lighten the wood further and preps it for new stains or paint.
Rinse the wood with clean water, and let it dry completely before proceeding.
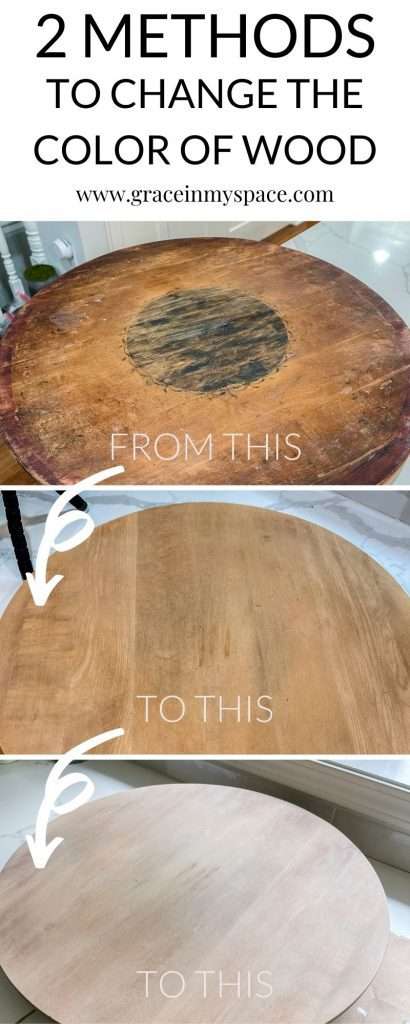
Credit: graceinmyspace.com
Sanding Process
The sanding process is crucial when transforming dark stained wood to a lighter shade.
It requires patience, technique, and the right tools. Before diving into the task, understanding the basics of sanding is essential.
This process removes the top layer of stain, revealing the wood’s natural grain beneath. By following these steps, achieving a fresh, lighter look for any wood piece becomes possible.
Selecting The Correct Sandpaper Grit
Choosing the right sandpaper grit determines the quality of the finished surface:
- Coarse grits (40-60) are best for removing old finishes fast.
- Medium grits (80-120) help to smooth out the rough texture left by coarser grits.
- Fine grits (150-220) are ideal for a smooth, lightened wood surface.
Begin with a coarser grit and move through progressively finer grits for the best result.
Manual Vs. Power Sanding
Both manual and power sanding have distinct advantages:
| Manual Sanding | Power Sanding |
|---|---|
| Offers precision and control. | Saves time on large surfaces. |
| Ideal for small projects. | Efficient for removing multiple layers. |
| Less risk of damaging wood. | Creates uniform surfaces with less effort. |
Tip: For intricate areas, manual sanding is recommended. Use power sanders for larger, flat areas.
Sanding Tips For Even Results
Sanding can be tricky, but these tips ensure even, consistent results:
- Sand in the direction of the wood grain.
- Check progress frequently to avoid over-sanding.
- Use a sanding block for flat surfaces to maintain even pressure.
- Keep sandpaper clean to prevent clogging and uneven sanding.
- Wipe wood with a tack cloth after each sanding stage to remove dust.
Repeat these steps with increasingly finer sandpaper until the desired lightness is achieved.
Treating The Wood Post-sanding
Once you’ve sanded your dark stained wood, it’s not ready for lightening just yet. Treating the wood carefully after sanding is crucial to achieve the best results.
This process involves removing any leftover residues, preparing the wood to accept a new stain, and finally, applying a lighter stain or treatment.
Neutralizing Chemical Strippers
After using a chemical stripper, you need to neutralize its effect.
- Apply a neutralizing solution to the wood
- Use a clean rag or sponge for application
- Ensure even coverage across the surface
- Let it sit as per product instructions
- Rinse with clean water if necessary
The goal is to balance the wood’s pH levels before applying a new treatment.
Conditioning The Wood
Conditioning is vital for a uniform appearance.
- Choose a high-quality wood conditioner
- Apply liberally with a brush or cloth
- Allow it to penetrate the wood
- Wipe off excess after 15 minutes
Conditioning prepares the wood and helps avoid blotchy spots.
Choosing A Light Stain Or Treatment
Picking the right light stain is essential.
| Type of Stain/Treatment | Effect on Wood |
|---|---|
| Water-Based Stain | Lightens with minimal grain raising |
| Oil-Based Stain | Offers deeper penetration |
| White Wash | Provides a rustic, whitened look |
Select a stain that achieves the desired lightness and complements the wood grain.
Finishing Touches
Transforming dark stained wood into a lighter, more modern finish requires a touch of finesse.
After the process of stripping and lightening, the Finishing Touches ensure long-lasting and aesthetically pleasing results.
The final steps involve applying a light stain, sealing the wood for protection, and knowing how to maintain that fresh, light look.
Applying The Light Stain
Once the wood is ready for its new hue, it’s time to select and apply your chosen light stain. Consider using a water-based stain for its quick drying time and ease of cleanup.
Here’s a step-by-step guide to ensure an even application:
- Stir the stain well before use to evenly distribute color.
- Use a high-quality brush or soft cloth to apply.
- Work in sections, maintaining a wet edge to avoid lap marks.
- Wipe away excess stains with a clean cloth after a few minutes.
- Allow adequate drying time before applying additional coats if a deeper color is desired.
Sealing The Wood
Protecting your newly lightened wood is crucial.
Sealing locks in the color and protects against wear and tear. Choose from a variety of sealers like polyurethane, lacquer, or wax, depending on your preference for sheen and durability.
To seal your wood:
- Ensure the stain is completely dry before sealing.
- Apply the sealer with a clean brush or cloth.
- Allow the first coat to dry, then lightly sand for smoothness.
- Apply a second coat for additional protection.
- Follow the product’s specific drying times.
Maintaining Light-stained Wood
Upkeep is key to ensuring your light-stained wood stays beautiful. Regular maintenance keeps the wood looking fresh and prevents discoloration.
Incorporate these simple practices for the best results:
- Avoid prolonged exposure to direct sunlight which can darken the stain.
- Dust and clean regularly with a soft, damp cloth.
- Use coasters and padding to prevent water rings and scratches.
- Reapply sealer as needed, checking the manufacturer’s recommendations.

Credit: opendoorsopenhearts.com
FAQs On How To Make Dark Stained Wood Lighter
Can Dark Stained Wood Be Lightened?
Yes, dark-stained wood can be lightened by sanding it down and applying a lighter stain or wood bleach.
What Can I Add To Wood Stain To Make It Lighter?
To lighten wood stain, mix in a compatible wood stain of a lighter color or use a wood stain diluent such as mineral spirits or water for water-based stains.
How Do You Change Wood Color From Dark To Light Without Sanding?
To lighten dark wood without sanding, apply a chemical wood bleach directly to the wood, following the manufacturer’s instructions, then neutralize and wipe clean.
How Do You Lighten Stained Wood Cabinets?
To lighten stained wood cabinets, gently sand the surface, apply a wood bleach per the instructions, and seal with a clear finish for protection.
Conclusion
Brightening dark stained wood can transform a space, adding freshness to your decor. This guide has walked you through the steps, offering practical solutions.
Remember, patience and careful application yield the best results. Embrace lighter tones and refresh your furniture with confidence.
Your revitalized pieces await!